A Warframe's base Sprint Speed Stat is not a direct modifier to its sprint speed, but is actually the Warframes base Movement Speed modifier. At a base Sprint Speed of 1.0, Warframes have a walk speed of 6 m/s. A base Sprint Speed stat of 1.2 will increase a Warframe's speed to 7.2 m/s, while a base Sprint Speed stat of 1.4 will increase it to 8.4 m/s.
All Movement Speed bonuses are multiplicative to this modifier.
Sprint Speed bonuses do not affect a Warframe's Movement Speed, even though they increase the listed Sprint Speed stat in the arsenal.
Increasing or decreasing the base Sprint Speed using mods or through other sources will not change the base walking speed, only modifying the sprint animation speed. For example, an unmodded Gauss has a base Sprint Speed stat of 1.4 and will walk faster than a Mesa equipped with Rush (1.43 Sprint Speed). However, they will share similar running speeds. Additionally, an unmodded Gauss will walk the same speed as Gauss with Rush.
Movement Speed buffs directly affect the following maneuvers:
Walking speed
Walking speed while aiming
Crouch speed
Crouch walking speed
Movement Speed buffs indirectly affect the following maneuvers:
Sprint speed (due to increasing base walk speed)
Rolling distance (due to inheriting momentum from walking/sprinting)
Sliding distance (due to inheriting momentum from walking/sprinting)
Aim glide speed (due to inheriting momentum from walking/sprinting)
Jump kicking distance (due to inheriting momentum from walking/sprinting)
Chroma expends 50Energy to shed his outer pelt, imbued with elemental energy while sprouting wings and converting it into a stationary floating sentry with 1000 / 2000 / 4000 / 8000Fleshhealth and 140Ferrite Armor. The sentry will attack all enemies within 20 meters with a continuous stream of elemental energy, dealing 100 / 200 / 300 / 400Heat, Electricity, Toxin, or Cold damage per tick with a ?% status chance at 5 ticks per second. If enemies come within 5 meters of the sentry, it will periodically unleash a radial knockback that inflicts 200Heat, Electricity, Toxin, or Cold damage and Ragdoll. The sentry can also unleash a radial roar to temporarily stun all enemies within 30 meters.
Damage type is based on Chroma's current elemental alignment, determined by Chroma's primary emission color or the selected element of Spectral Scream.
Enemies killed by the sentry have a 15% / 30% / 45% / 60% chance to drop additional credits. In addition, all credits that drop within 10 meters of the sentry yield 25% / 50% / 75% / 100% additional credits.
For enemies killed by the sentry within the percentage credit bonus range, credit income is increased by an average of 43.75% / 95% / 153.75% / 220%. This assumes the credit chance on kill results in double credits from that enemy.
While Effigy is active, Chroma can fight in his lightened form, gaining 20% movement speed but with a 50% armor reduction.
The armor reduction is a multiplicative penalty that's applied to Chroma's total armor (e.g., with a maxed Steel Fiber and Intensify, Chroma with Vex Armor at full capacity will have his armor lowered to 350 × (1 + 1.1 + 3.5 × 1.3) × 0.5 = 1,163.75 when Effigy is activated).
Effigy drains 10 energy per second while active, and will deactivate if Chroma runs out of energy, sentry health is depleted, or if manually deactivated by pressing the ability key again (default 4 ).
Ability Synergy: Effigy's damage per tick and knockback damage can be boosted by the Fury aspect of Vex Armor.
Effigy will only maintain the damage increase from Fury so long as Chroma's Effigy is within range of Vex Armor.
When deactivated, Chroma can teleport his pelt from anywhere onto himself. This will stop movement and interrupt any action Chroma is doing, such as reloading, leaving a player vulnerable.
When deactivated while sliding, Chroma's pelt will be reapplied to him without triggering the animation, even if the player immediately cancels his slide.
Both the initial cast and the return of Chroma's pelt will cease any actions as they are a two-handed ability.
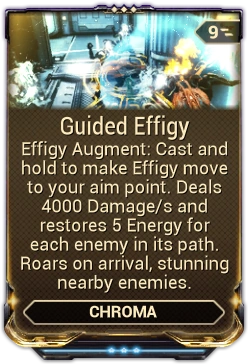
Guided Effigy is a Warframe Augment Mod for Chroma's Effigy that allows him to control the Effigy, dealing rapid damage to enemies in its path while recovering energy and stunning enemies at the destination.
The pelt usually unleashes its roar a few seconds after deploying. This allows you to quickly deploy the sentry for a temporary stun to all nearby enemies.
The pelt can be Banished, preventing damage from non-banished enemies while still being able to damage all enemies normally.
The pelt gains shields from the Shield Osprey Eximus Specter.
As the pelt will not move from the spot it is cast on (unless the Guided Effigy mod is equipped), it would serve quite well as an impromptu turret. As such, it is recommended to place the pelt on top of an objective that needs to be defended such as in a Defense mission. If that is the case, then it is recommended to equip energy-regenerating mods such as Rage or Hunter Adrenaline to keep the pelt active for as long as possible.
Equinox expends 25Energy to transform between her night or day forms. She acquires abilities exclusive to each form and gains bonuses that diminish over 10 / 15 / 20 / 25 seconds.
These bonuses decay linearly every second until they equal zero on ability expiration.
Upon switching to Night Form, Equinox can use Rest, Pacify, and Mend.
She gains 100 / 150 / 200 / 250armor and 50 / 75 / 100 / 150shields.
Both are additive with Equinox's current armor and shield capacity (e.g., a level-30 Equinox with a maxed Redirection, Steel Fiber, and Intensify will have 370 + 370 × 1 + 150 × 1.3 = 935 shields and 135 × 2 + 250 × 1.3 = 595 armor within the first second of a rank-3 Metamorphosis after the initial transformation is complete).
On missions with ice hazards, the shield decay rate is halved. When the ability ends, Equinox will be left with overshields equal to 50% of the listed maximum shield bonuses.
Day form
Upon switching to Day Form, Equinox can use Rage, Provoke, and Maim.
She gains 10% / 15% / 20% / 25% weapon damage and 5% / 10% / 12% / 15%Movement Speed.
The damage buff is additive with the base damage of weapons (e.g., with a maxed Heavy Caliber and Intensify, a weapon that inflicts 250 base damage will be increased to 250 × (1 + 1.65 + 0.25 × 1.3) = 743.75 within the first second of a rank-3 Metamorphosis after the initial transformation is complete).
Does not work on melee weapons
The movement speed buff is additive with other movement speed modifiers (e.g., with a maxed Dispatch Overdrive and Intensify, a rank-3 Metamorphosis will increase Equinox's move speed to (1 + 60% + 15% × 1.3) = 1.795 times her base speed within the first second after the initial transformation is complete).
Form switch takes about 1 second to complete.
Switching between forms removes any bonuses granted by the previous form. Only a single set of Metamorphosis buffs can be active at any given time.
While switching, Equinox cannot cast any abilities but can perform all other actions such as moving and using weapons.
Pacify & Provoke and Mend & Maim are deactivated upon casting Metamorphosis. However, casting Metamorphosis in Day Form while Provoke is active will increase the armor and shield bonuses for Equinox's Night Form.
During the transformation, Equinox momentarily becomes whole with her night and day features merged together, then separates into the opposite form.
Duality is a Warframe Augment Mod for Equinox that causes her opposite form to split from her when casting Metamorphosis, creating a Specter armed with the weapon Equinox was using during casting.
Gyre’s mechanisms spin at incredible speeds, generating an Electric Field that shocks nearby enemies. When Gyre gets a critical hit, a large electrical discharge will chain from the enemy that was hit to nearby enemies.
With a graceful whirl, Gyre expends 100energy to overcharge her coil gown as its rotors gyrate rapidly and conductive plating lift apart, granting her a 50% movement speed bonus lasting for 10 / 14 / 18 / 22 seconds. A sustained radial electrical surge contained within a ring of Gyral Blocks surrounds Gyre, shocking all enemies within a 4 meter sight detection radius around her to inflict 100 / 150 / 200 / 250Electricity damage per second with a guaranteed status effect.
Damage per second can damage and break destructible Objects in range.
Gyre's player camera positions itself further away while Rotorswell is active to expand her field of view.
Electric field is a spherical radius around Gyre that affects enemies above and below her, despite the visual indicator being represented by the horizontal Gyral Block ring.
While active, inflicting a Critical Hit from Gyre's weapons or abilities against an enemy target triggers a lightning discharge that chains outward, striking the target plus up to 5 other enemies within a 10 meter sight detection radius around the source enemy. The source enemy and chained enemies are inflicted 250 / 300 / 400 / 500Electricity damage with a guaranteed status effect. Up to 2 lightning discharges from 2 separate critical hits can occur simultaneously; after discharging, Rotorswell undergoes a 1 second cooldown before it can create discharges again.
Discharge damage is independent of the used weapon's damage.
Ability Synergy:
Gyre's passive and Cathode Grace enable ability Critical Hits by granting 0% to 300% critical chance to damage and status effects dealt by Rotorswell.
Critical hits dealt by Arcsphere, Coil Horizon, Rotorswell's electric field and its discharge will trigger the discharge effect.
Direct kills by Rotorswell, its Electricity status effects, and kill assists from allies extend Cathode Grace's duration.
Killing enemies with Cathode Current active releases an additional discharge from Rotorswell while extending its duration equal to Cathode Grace's bonus duration.
Can be recast while active to briefly cancel the ability then renew into a new instance with full duration.
Casting Rotorswell is a full-body animation that interrupts Gyre's grounded movement and other actions.
In Landscapes, deploying and riding an Archwing or a K-Drive while Rotorswell is active will retain the gyrating transmitters and will keep dealing damage.
This is also true when casting Rotorswell before getting off a Railjack to fly via Archwing, giving an additional damaging source while engaging enemy craft in melee.
Gyre visually performs a clockwise pirouette from where she stands, ending the whirl with a right-footed stomp as she braces her arms to the sides for the electrical overcharge. Gyre's body is enveloped in electricity, as 8 Transmitter Drones launch outward and take flight in a zigzagging pattern, following Gyre wherever she goes to detect her critical hits and discharge a lightning strike against her targets. Her coil gown's crinoline splits apart and lifts the conductive plating up to the sides to provide her ample legroom for swift movement. A persistent horizontal ring of 72 Gyral Blocks materializes and surrounds Gyre to denote her electric field's radius, while the electric surge spreads from her coil gown out toward the ring and concentrates itself within Gyre's proximity as the electrical current stabilizes.
Transmitter Drones use the same model as Vauban's grenades and default to the silver coloration and white energy. They travel their own flight paths and attempt to follow Gyre once she moves away.
All Gyral Blocks have a stylized engraving that resembles Mastery Slate Decorations, rapidly spinning counterclockwise along the X axis and pulse together in a wave-like pattern. The spacing between Gyral Blocks widens or tightens depending on Gyre's Ability Range stat.
Tips & Tricks
Synergizes particularly well with high ammo, high fire rate guns even if they have low damage and/or critical chance such a full-auto Tiberon Prime, as the lightning arcs' damage is independent of said weapons' damage and the fire rate may compensate for the low chances at critical hits.
Can also work for high fire rate, high multishot but mediocre critical chance shotguns such as the Boar Prime, as their individual pellets have their own chance at striking a critical hit.
As the electrical discharges from Rotorswell require only critical hits and not critical kills to trigger, weapons with high potential for extremely high critical chance and high fire rate/attack speed - such as the Grakata, Soma Prime with Hata-Satya, or Tekko - will synergize extremely well with the ability.
Activating Rotorswell before riding an Archwing or a K-Drive will make Gyre deadly against enemies that get too close.
Command Venari to focus on a target. Hold to cycle between Attack, Protect, and Heal postures. If Venari is killed, use this ability to revive her instantly.
Misc:
120 s (mark duration) 45 s (respawn time) 2.5 s (snare duration) 5 (hits per snare) 3 s (Attack & Protect cooldowns) < 90% HP (missing health threshold) 10 m (Heal aura radius) 65 s (Venari self-heal mark duration)
Khora commands her loyal Kavat companion Venari to prioritize a target on the aiming reticle for 25energy, leaving Venari's mark above the target for 120 seconds. Once commanded, Venari chases the marked target if nearby or teleports to it if far away, while refreshing the special effect for her battle posture if it is on cooldown. When Venari reaches the target, she will perform different tasks depending on her battle posture.
The target is marked by a floating battle posture icon above their head.
Venari's mark cannot be recast on the same target while still active.
Venari's mark lasts until removed via duration end, Khora marking a different target, switching battle posture, or the target is killed.
Marked targets are prioritized by Venari over enemies afflicted by Slash with Hunter Command equipped.
When a target is marked, Venari audibly snarls in response.
While Venari is alive, Khora passively gains a 1.05x / 1.1x / 1.12x / 1.15x movement speed multiplier. This stacks multiplicatively with speed mods like Rush. When Venari is killed, she will respawn beside Khora after 45 seconds or instantly by casting this ability using 50 energy.
Speed multiplier stacks multiplicatively with mods such as Rush.
Revive energy cost is reduced proportionately based on the remaining time until Venari respawns (e.g. 1 second remaining on timer = 1 energy used to revive Venari.)
Respawn time is not affected by mods.
Respawn time is displayed on the ability icon when Venari is killed.
When respawned, Venari visually leaps down from above landing next to Khora.
All postures are available by default when Venari is unlocked at Warframe rank 5.
Holding the ability key (default 3 ) cycles to Venari's next battle posture for no energy cost, and also deactivates any current Mark:
Khora commands Venari to adopt her Attack posture, causing her to ferociously assault nearby enemies and allowing her to use Snare. During Snare, Venari chains her chosen target in place for 2.5 seconds, as she damages the target with 5 hits over the course of the animation; each hit inflicts 350Slash damage with a guaranteed Status Effect proc. Snare has a cooldown of 3 seconds, which can be bypassed by Khora manually marking a target.
Snare damage is affected by by Maul, Venom Teeth and other elemental damage mods.
Snare is capable of Status Effect procs with every hit in addition to the forced Slash proc. It inherits Venari's Status Chance and damage spread shown on the Arsenal as normal.
Snare has 0% critical chance and is not affected by Bite or Hunter Synergy.
Venari's Attack mark can only be cast on an enemy target.
Venari's Attack mark will remain on the target until it expires, allowing Venari to focus on killing the target with multiple Snare attacks.
Snare is not affected by Swipe's multiple targeting and range extension.
Casting Snare is a full-body animation that causes Venari to maneuver around the target, before reappearing near the target once finished.
Venari is still vulnerable to damage while performing her special attack animation.
During Snare, the target is visually held in place by living chains that attach to nearby surfaces.
Khora commands Venari to adopt her Protect posture, causing her to defend Khora or herself from the nearest enemy and allowing her to use Tail Whip. During Tail Whip, Venari spins in place to inflict Knockdown and Disarmed on a single enemy. Tail Whip has a cooldown of 3 seconds, which can be bypassed by Khora manually marking a target.
Tail Whip will affect the target even if it moves away from Venari during her spin animation.
Does not knockdown nor disarm enemies innately wielding melee weapons.
Venari's Protect mark can only be cast on an enemy target.
Venari's Protect mark is removed once Tail Whip is performed on the target.
Casting Tail Whip is a full-body animation that stops Venari in place.
Khora commands Venari to adopt her Heal posture, imbuing her with healing energy and allowing her to use Revitalize. When the current Health of any ally player in the squad or Venari herself reaches below 90% of maximum health, Venari snarls and radiates a healing aura with a 10 meters radius; during Revitalize, Venari instinctively seeks out and follows the player with the lowest amount of current health, granting the target and any nearby injured allies 50 health regen per second while they remain in the aura.
Venari's Heal mark can only be cast on an ally target.
Venari's Heal mark is removed once Khora marks another target, the target is killed, or Khora switches battle posture.
Venari will immediately activate Revitalize then follow the marked target, if Khora marks a target or herself by casting 3 without a target on the aiming reticle. A quick and reliable way of marking Khora herself is to aim straight up briefly then casting the ability.
Venari will closely follow its target and Revitalize will not deactivate until the mark is removed. While following a target, Venari also will not attack nearby enemies unless she is equipped with supplemental attack mods like Sharpened Claws or Pounce.
Khora can mark Venari to activate Revitalize, causing Venari to stand still at her current position for 65 seconds or until the mark is removed.
Growing Power increases healing per second when Venari activates Revitalize during its effect; the bonus healing per second persists until Revitalize is deactivated.
Activating Revitalize is a full-body animation that stops Venari in place, while deactivating Revitalize does not require an animation.
While the healing aura is active, Venari and the affected allies glow in Khora's chosen energy color.
The healing aura is strong enough to keep Khora alive indefinitely within a Survival mission after the life support runs out, however since enemies stop spawning at this state it has limited usefulness.
The healing aura is strong enough to keep Khora alive indefinitely within a Vampire type Nightmare Mode mission without having to kill any enemies for health regeneration.
Battle posture cannot be switched while Venari is dead, instead the respawn function overrides any input on the ability key.
While Venari is in a neutral state with no active Marks she is far less likely to get stuck in terrain, frequently teleporting in beside you if you have gotten ahead of her.
Casting speed on all animations related to this ability, on both Khora and Venari, is not affected by mods such as Natural Talent and Speed Drift.
Venari does not benefit from the set bonus of Hunter Mods.
Set Mods equipped on Venari do not count towards the number of mods equipped for the set bonus.
Fetch equipped on Venari does not stack with Vacuum or Fetch equipped on companions.
Casting Venari's mark and summoning Venari do not play any animations on Khora, while changing posture is an upper-body animation that allows movement and parkour Maneuvers.
Khora's metallic adornments and Venari's tail change appearance depending on the selected posture: Attack (long spikes), Protect (small stubs and hammer tail), and Heal (curved blades).
While Venari is dead, Khora's metallic adornments are hidden from view and will reappear once Venari respawns.
The following visual effects are affected by Khora's chosen Warframe energy color:
Venari's eye and regalia colors, mark icon color, as well as her death and respawn/teleport landing impact.
Khora's battle posture switching.
Attack posture Snare trails and Heal posture Revitalize glow.
Venari Bodyguard is a Warframe Augment Mod for Khora's Venari that makes Venari die in Khora's place at the cost of an increased spawn timer, but every enemy killed decreases the spawn timer.
Khora's passive speed multiplier affects her regular movement speed, which also enhances sprint speed. Combine with high Ability Strength and sprint speed mods such as Rush and Armored Agility to gain vastly increased mobility.
Keep moving and do parkour maneuvers while switching battle postures to evade incoming enemy attacks.
By default, Venari will attack enemies and perform her battle posture effects on her own. Place a mark on your target to direct Venari's attention where you desire.
Equip Hunter Recovery on Venari and place an Attack mark on a distant enemy. Venari will teleport to the target and immediately use Snare to attack it, quickly healing Khora in the process.
Use Protect mark to knockdown and disarm dangerous threats such as Napalm and Tech.
Heal mark allows versatile options to grant health regen in an area:
Use on an ally or Khora herself to have Venari follow suit.
Use on Venari to order her to stay put.
Use on Khora if Venari is far away to recall her back to your side.
Use on an ally in the distance to teleport Venari to the fray.
Venari's Heal posture is able to heal static objectives such as Cryopods, Excavators, and Kuva Harvesters. Place a Heal mark on the objective to have Venari stand guard over it providing healing to it and nearby teammates. It can also be used to heal moving objectives like defectors and hostages.
Cast Ensnare to group up enemies for Venari to attack them for double damage.
Bugs
Slash procs do not change Venari's target with Hunter Command equipped, even when no enemies are marked.
Venari's UI will be completely hidden if Venari is dead and the player uses Transference to return to the Warframe.
Venari's respawn function can rarely not trigger when Venari is killed, requiring Khora to spend a revive on herself to bring Venari back.
Venari randomly stops moving when her heal aura is activated. This bug occurs for targets she automatically chooses to heal, as well as targets marked by Khora. Switching to Attack or Protect postures will reset her AI to normal.
Placing a Heal mark on Khora or an ally sometimes causes Venari to toggle the healing aura on and off repeatedly as she edges toward the marked target.
Venari is not going to collect items with Fetch mod. (only works well playing solo mode)
Locked lockers unlocked by Venari via the Scavenge mod still appear as locked (red) despite being unlocked, and can still be opened.
Fear Sense can sometimes make enemy markers appear outside of the minimap in the UI if Venari uses it and Khora moves away from the enemies.
If during a Sortie the energy level is insufficient to cast this ability, then it will be rendered inactive completely. The side effect is that if Venari dies it will not revive itself during the mission.
Client only: If Venari dies and the ability is cast to revive her, the passive movement speed may be applied with unmodded Strength.
Nezha expends 25energy to ignite his Wind Fire Wheels to gain 15% / 15% / 20% / 25% bonus Movement Speed for 15 / 20 / 25 / 30 seconds, while leaving behind a trail of fire beneath his feet that lasts for 5 / 6 / 7.5 / 10 seconds. Enemies that walk over the flames are dealt 50 / 100 / 150 / 200Heat damage per 0.5 seconds, with each instance of damage having a 10% / 25% / 50% / ?Heatstatus chance. While Nezha and his allies stand on the flames, they are immune and continually cleansed of all Status Effects.
Cast animation of ~0.5 seconds, affected by Casting Speed.
Flames can be formed in mid-air but only while Bullet Jumping. Falling will not leave behind any flames.
Ability Synergy: If Fire Walker is active when using Blazing Chakram's teleportation, Fire Walker will overheat at the destination and deal 500 / 750 / 1000 / 1250Heat damage with a 10% / 25% / 50% / ?Heatstatus chance within a radius of 3 / 4 / 5 / 6 meters, as well as leaving a lingering ring of Fire Walker's flames for ? seconds.
Damage does not bypass obstacles in the environment and diminishes with distance.
Fire Walker can be cast while moving but will interrupt all other actions.
Can be recast while active to refresh its duration.
Subsuming Nezha to the Helminth will offer Fire Walker and its augments to be used by other Warframes.
This does not allow other Warframes to use Fire Walker's explosion on teleport. This is exclusively a synergy with Blazing Chakram.
Grants buffs to those who consistently perform actions in time to Octavia’s music. Timed jumps offer the Vivace speed buff. Crouching on the beat grants cloaking with the Nocturne buff. Firing rhythmically bestows Opera multishot buff. Timed melee swings give the Forte damage buff.
Octavia expends 75energy to produce a melodic musical aura with a radius of 6 / 8 / 10 / 12 meters for 8 / 12 / 16 / 20 seconds. Octavia and her allies gain an 10% / 15% / 20% / 35%Armor bonus while inside the melodic aura.
Metronome's music is in tune with the Melody section of the Mandachord, drawing from the preset musical notes to determine the melodic aura's note intervals.
While the player and allies can hear the melody, Metronome's aura is considered silent to enemies.
While inside the melodic aura, Octavia and her allies can perform specific actions in sync to the melodic music to gain various Sync Buffs that can be active simultaneously:
Each line of Melody notes is visually represented as a concentric ring of light, which begins at the edge of the melodic aura and shrinks toward Octavia’s feet, where the ring disappears as the sound of the notes are played.
In order to gain buffs, players must time their actions to sync with the moment a concentric ring is centered on Octavia, as the sound of the notes are played. A flash of light will appear below the player upon a successful sync.
Synchronize percentages are listed between 0% and 100%, and will raise or lower depending on the player's timing. Once the percentage reaches 100%, the player gains the corresponding buff.
Synchronize percentage is displayed as an icon with the current stored percentage beside the health and shield indicators on the HUD. Once synchronized, the corresponding buff icon will also be displayed with the remaining buff duration beneath and bonus percentage at the top-right of the icon.
Each player must perform actions individually to gain buffs. Sync buffs are gained per-player and are not shared between allies in range.
If a player does not perform an action when the ring disappears, their existing synchronize percentage does not decrease. however, if they do perform an action at the wrong time, their synchronize percentage resets; Meaning that players can skip certain beats and focus on precision if they cannot keep up with the Mandachord's rapid pace. This is particularly important for weapons with low fire rate / attack speed and with the vivace (movement speed) buff.
The amount of notes on one line of the Melody section on the Mandachord determines the brightness of the concentric rings.
By synchronizing with jumps (default Space ), Octavia and her allies can gain the Vivace buff which increases Movement Speed by 10% / 15% / 20% / 30% for 5 / 8 / 12 / 15 seconds.
Double jump (default press Space twice), wall climb (face wall and press Space ), and wall jump (face wall + W + Space ) can also be used to synchronize.
By synchronizing with crouching (default Ctrl ) or sliding (default W + Ctrl ), Octavia and her allies can gain the Nocturne buff which grants Invisibility for 5 / 8 / 12 / 15 seconds.
Octavia possesses two Appearance Auxiliary Attachments that make her more visible to players during her Nocturne: Semi-Cloak, which makes the Warframe semi-transparent; and Glow-Cloak, which produces an opaque glow. These appearances are affected by primary energy color and do not alter how enemies perceive the player.
By synchronizing with ranged weapon fire (default LMB ), Octavia and her allies can gain the Opera buff, granting 12% / 20% / 25% / 30% ranged weapon Multishot for 5 / 8 / 12 / 15 seconds.
Multishot bonus stacks additively with multishot mods such as Split Chamber.
Alternate-fire or secondary attacks on select weapons are not known to be able to gain multishot from Opera (requires testing).
By synchronizing with melee weapons (default E ), Octavia and her allies can gain the Forte buff, granting 20% / 25% / 25% / 30% bonus melee weapon damage for 5 / 8 / 12 / 15 seconds.
Damage bonus stacks additively with base damage mods like Pressure Point.
Metronome can be recast while active to refresh its duration. On recast, existing synchronize percentages will not carry over and will be reset to 0%.
Casting Metronome is not a One-Handed Action and interrupts other actions, but allows movement.
When Octavia is standing on higher elevations or objects, the concentric rings of light from the melodic aura will partially fade depending on the surrounding terrain to allow better visibility.
Concentric ring color and Nocturne cloak effect are affected by Octavia’s chosen Warframe energy color.
Metronome affects the visuals and audio of any nearby Mallet and Resonator belonging to Octavia herself.
Tips & Tricks
Having the mandachord's melody set to a consistent rhythm makes it much easier to sync up your buffs.
Similar to Octavia's other abilities, without a melody this skill will do nothing.
The longer the pause is between notes, the higher is the percentage gained per successful action.
The intensity of light rings is determined by the number of notes in a particular column.
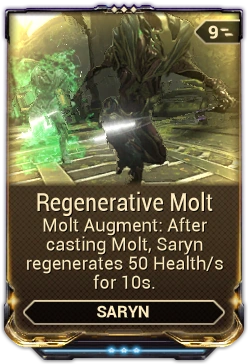
Saryn expends 50energy to shed her skin, removing all existing status effects and increasing her Movement Speed by 30% / 35% / 40% / 50% for 3.5 / 4 / 4.5 / 5 seconds, while leaving behind a decoy with 400shields and 150 / 300 / 400 / 500health that draws enemy fire for 14 / 24 / 32 / 40 seconds. When deployed, the decoy is Invulnerable for 1.5 / 2 / 3 / 3 seconds, during which all incoming damage absorbed by it is converted and added to its health. The decoy will explode if it loses all of its hitpoints, if its duration expires or if the ability is cast again, inflicting 240 / 300 / 350 / 400Toxin damage with 100%Toxinstatus chance to all enemies within 5 / 6 / 7 / 10 meters from it. A maximum of 1 Molt can exist.
Explosion damage does not bypass obstacles in the environment and diminishes with distance.
Recasting while active will detonate the Molt and spawn a new one.
Does not have a cast time or animation.
Molt's decoy is placed at Saryn's current position, mirroring her pose and elevation.
Elemental augment mods, such as Ember's Fireball Frenzy, can be applied to Molt. The damage augment will not affect the explosion damage or damage type upon Molt's expiration.
Molt cannot be knocked down or moved, and acts as a physical object, unlike Loki's Decoy.
Molt will slowly vaporize and dissipate for its duration, eventually exploding once it nearly vanishes.
Casting Molt can be done while performing any action without interrupting it, including reloading, charging, shooting, maneuvering, and while on a zipline.
Can be cast in all states (except while upside down in a flip jump or while dodging) and can be reused instantly.
Subsuming Saryn to the Helminth will offer Molt and its augments to be used by other Warframes.
Using during a well timed jump can result it being low enough for enemies to target, such as Infested or Melee units, but be more protected from most melee attacks. (Ancients will still be able to reach, as well as the knockback damage from Leapers).
Place Molt in locations which can protect it from enemy attacks to maximize its survival.
Limbo can utilize this ability by casting Banish on the decoy, granting it immunity to all attacks that do not affect targets in the Rift Plane.
If Molt is closer to the enemy than the player, enemies will (normally) focus it. Applies to the caster as well as other players, unless they're using aggro-increasing abilities such as Nyx's Absorb or Rhino's Iron Skin.
It can be used as protection from enemy fire, when you revive an downed teammate.
Bugs
When knocked back by an Ancient, the physical target of the decoy will move, but the model remains in place. This can be seen while having Enemy Sense and Enemy Radar equipped while seeing the decoy (as a friendly blip) against a group of infested.
For clients, Molt will sometimes be in a default standing position when deployed.
Volt expends 25energy to energize the surrounding area, increasing the mobility of himself and his allies within 25 meters. Affected players will gain 10% / 15% / 20% / 25% weapon Reload Speed and 75% melee Attack Speed and Movement Speed bonuses, lasting for 9 / 10 / 11 / 12 seconds.
The attack speed buff grants an additive bonus that will stack with other attack speed modifiers. (e.g., Fury combined with Speed at max rank and +30% Ability Strength will increase Volt's attack speed by 0.75 × 1.3 + 0.3 = 127.5%).
The movement speed buff grants a multiplicative bonus that will stack with other movement speed modifiers. (e.g., Rush combined with Speed at max rank and +30% Ability Strength from Intensify will increase Volt's sprint speed by (1 × 1.3) × (1 + (0.75 × 1.3)) − 1 = 156.75%).
The reload speed buff grants an additive bonus that will stack with other reload speed modifiers. (e.g., Quickdraw combined with Speed at max rank and +30% Ability Strength from Intensify will increase Volt's reload speed by 0.25 × 1.3 + 0.48 = 80.5%).
Allies can backflip to remove Speed if they wish to opt-out.
Increases the distance of Maneuvers like the sliding front flip and wall run as a result of the faster sprint speed.
Can be used while performing many actions without interrupting them, including reloading.
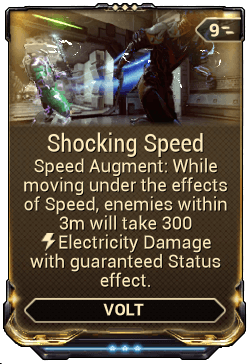
Shocking Speed is a Warframe Augment Mod for Volt's Speed that causes him and his allies to inflict Electricity damage and status to enemies within close proximity while moving.
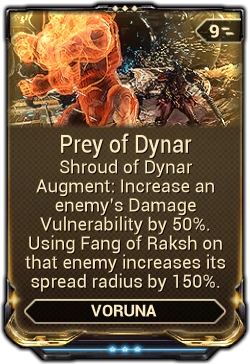
(TAP) Dynar shrouds Voruna with invisibility and accelerates her speed. Invisibility ends when Voruna attacks. For a short time, melee attacks have increased Critical Damage and Status Chance and inflict Bleed. Melee kill an enemy during this time to extend the buff.
(HOLD) Dynar guards Voruna, increasing her Parkour Velocity.
Dynar enshrouds his mistress in the night's veil to endow her with stealth, speed, and lethality. Shroud of Dynar expends 25energy to render Voruna and her Companion both Invisible and accelerates her movement speed by +25% / +50% / +75% / +100% for 8 / 10 / 12 / 14 seconds, ending immediately upon ability expiration or when she performs a ranged weapon attack (default LMB ), or after the first melee animation completes when she performs a melee weapon attack (default E ).
Performing interactions such as picking up objects, Hacking, or reviving from Bleedout does not break invisibility.
Attack-related contextual actions (default X ), such as melee Finisher attacks and Parazon Mercy, will break invisibility instantly when the animation begins.
Invisibility duration timer is displayed on the ability icon.
While active, her melee weapon gains the following statistic buffs: +0.5x / +1.0x / +1.5x / +2.0x flat Critical Damage, Critical Chance set to a flat 100%, Status Chance set to a flat 25% / 50% / 75% / 100%, and guaranteed Slash status effect per hit.
Melee weapons modded with above 100% critical chance and/or status chance are not affected by Shroud of Dynar's absolute chance bonuses.
Guaranteed Slash status effect from Shroud of Dynar does not apply to non-melee strikes from melee weapons, such as explosions (Wolf Sledge), projectiles (Nepheri), and Zenistar's special attack.
Leaving invisibility will extend the melee buffs for 3 seconds. While Shroud of Dynar is active, melee kill 1 enemy to extend the remaining buff duration to a maximum of 5 / 6 / 7 / 8 seconds.
Duration extension can only be triggered once per cast; any subsequent melee kills will not extend the ability further.
Max duration on melee buff can be immediately reached with a lethal melee hit on an enemy during the invisibility phase.
Melee buff total duration is calculated with the following expression:
At ability rank 3 with a maxed Continuity equipped, Shroud of Dynar lasts for 3 secs + [(8 secs - 3 secs) × 1.3] = 9.5 seconds
In-game Ability menu stat displays the minimum duration up to the max modded duration.
Buff duration timer is displayed as an ability buff icon beside Voruna's hitpoints indicator.
Hold down the ability button (default 1 ) to command Dynar to guard Voruna, changing her passive to a permanent +55% Parkour Velocity bonus for no energy cost.
While Shroud of Dynar's invisibility phase or melee buff phase is active, Ulfrun's Descent's Slash damage benefits from the absolute critical chance and the flat critical multiplier bonus.
Cannot be recast during invisibility. Can be recast while melee buffs are active to end them immediately then become invisible.
Dynar visually idles upon Voruna's left shoulder. His distinct physical feature is the eyepatch covering his left first eye.
Voruna visually leaps and claws downward, cloaking herself in shadowy tendrils that envelop her body. Shadows dance around her feet while she kicks up a trail of dust clouds as she moves, while Dynar audibly growls and snarls.
Voruna possesses two Appearance Auxiliary Attachments that make her more visible to players during her Shroud of Dynar: Semi-Cloak, which makes the Warframe semi-transparent; and Glow-Cloak, which produces an opaque glow. These appearances are affected by primary energy color and do not alter how enemies perceive the player.
Activate Dynar's passive to make Voruna highly mobile when extracting from a mission. To further increase her survivability in the process, activate Shroud of Dynar while running through enemies to escape detection.
Shroud of Dynar is also a good way of surviving being overwhelmed by too many enemies by suddenly going invisible and interrupting their attacks, giving Voruna breathing space to plan for a counterattack.
Modding for high Ability Duration and combining Infested Mobility gives Voruna the mobility to quickly speed through missions undetected.
Bugs
Bugs
Blast detonations will break Shroud of Dynar invisibility.
Choose and summon a Reservoir filled with Motes that attach to and aid Wisp and her allies. Haste Mote grants increased movement and attack speed. Vitality Mote increases maximum health and heals over time. Shock Mote stuns nearby enemies.
Birthed from Wisp's dimensional habitat, three species of Reservoir pods nursing friendly Motes can be selectively summoned by Wisp. Tap the ability key to freely cycle the selection wheel between the Vitality, Haste, and Shock reservoirs. Hold down the ability key to summon the selected reservoir from a portal above Wisp for 25energy, placing the pod directly in front of her. The reservoir pods have a range of 5 meters and last indefinitely, while the motes retrieved from the pods lasts 19 / 22/ 26 / 30 seconds while outside of the reservoirs. Wisp can summon a maximum of 6 reservoir pods.
Casting additional reservoir pods will replace the oldest pod.
Up to three different reservoir types can be unlocked as the ability is ranked up:
Vitality: unlocked by default (Unranked Warframe)
Haste: unlocked at rank 1 (Warframe Rank 7)
Shock: unlocked at rank 2 (Warframe Rank 14)
Reservoir selection wheel is displayed above the ability icons. The icon for the currently selected type is enlarged and shown on the left of the wheel. Tapping the ability key (default 1 ) will cycle between the reservoir types, while holding the key will deploy the selected reservoir (tap/hold functions can be inverted in the Settings).
Reservoir pods are invulnerable static floating objects that are permanently placed until removed by Wisp or by colliding with Nullifier Crewman bubbles.
This includes at least some allies spawned via Warframe abilities such as Nidus's Maggots via his Ravenous ability.
Motes attach to the entity that plucked them, floating in orbit and following their target wherever they go.
Motes grant the affected entity a specialized buff based on the reservoir type.
Motes respawn from their reservoirs after a brief cooldown if taken by an entity.
Motes last for a duration, with their timers able to be refreshed and paused indefinitely while the buffed entities are standing in range of the respective reservoir type.
Reservoir pods take on Wisp's Ability Strength when placed, and will remain at that Ability Strength percentage indefinitely.
If there are multiple reservoir pods, the pod with the highest buff value will take effect, with its corresponding duration.
A lower-value pod will still refresh the duration of a higher-value pod.
Each entity is limited to 1 active Mote buff per reservoir type.
The Vitality Mote increases maximum Health by 300 and restores 30 health per second.
Vitality Mote appears made of Infested flesh and sinew, shaped similar to a beetle shell with a red U-shaped crown.
Vitality Reservoir appears as a three-petalled plant with a red crown at its base. It constantly emits a flame-like energy particle effect.
The Haste Mote increases Movement Speed and melee Attack Speed by 20% and Fire Rate by 30%.
Haste Mote appears made of Infested flesh and sinew, shaped similar to a beetle shell with a green oval-shaped crown.
Haste Reservoir appears as a three-petalled plant with a green crown at its base. It constantly emits a liquid-like energy particle effect.
The Shock Mote stores an electrical charge that zaps up to 5 enemies within 15 meters with chain lightning every 3 seconds, dealing 10Electricity damage with a guaranteed Status Effect to stun enemies.
The electric charge shows as electricity surging around the Shock Mote when ready to discharge.
Shock Mote appears made of Infested flesh and sinew, shaped similar to a beetle shell with a blue hammer-like crown.
Shock Reservoir appears as a three-petalled plant with a blue crown at its base. It constantly emits an electrical spark particle effect.
Ability Synergy:
Casting Breach Surge on an active reservoir pod will teleport Wisp to its location and double Breach Surge's range.
Targeting a reservoir pod with the reticle will encircle it with Wisp's chosen energy color to indicate Breach Surge's ability to be cast on it and can be used at any range, provided there is line of sight.
Reservoir pods can be targeted through solid surfaces provided there is vision of them (e.g. windows).
Wisp cannot teleport to a pod while within less than 10 meters of it.
Currently obtained Motes provide additional properties to Sol Gate.
Vitality: Provides a 25% damage increase.
Haste: Allows Sol Gate to deal Corrosive procs on every damage instance.
Because motes will refresh the duration of any other mote buff (regardless of power), you can make very effective use of temporary Ability Strength buffs such as Growing Power, Energy Conversion, or (especially) the power increase from a Void Fissure mission. You can put down reservoirs while under these effects, acquire more powerful reservoir buffs, and then endlessly refresh their duration using regular-strength reservoirs. This makes any buff to power strength effectively infinite in duration, so long as you do not let your reservoir buffs expire (or get nullified).
Similarly, if there are multiple Wisps in a mission, they can space their reservoirs out to effectively gain all the buff benefits of the strongest Wisp, while also increasing the area covered.
Wukong expends 25energy to disappear into a cloud, turning Invisible for 2 seconds. In this form, Wukong gains +300%Movement Speed, along with vertical and horizontal flight capabilities using the movement (WASD ), crouch (Ctrl ), and jump (Spacebar ) hotkeys, similar to Archwing Maneuvers. While traveling in the cloud, Wukong is Invulnerable to damage, cleanses all Status Effects, and restores 0.5% / 0.6% / 0.8% / 1% health per meter travelled. Enemies that come within the cloud's radius of 5 / 6 / 7 / 8 meters are temporarily Stunned for 2 seconds and opened to Melee Finishers (default X ). Cloud Walker can be manually cancelled by pressing the ability key again (default 2 ) or by attacking.
Unalerted enemies staggered by Cloud Walker remain unalerted during the stagger animation, and thus can engage Stealth Kill Affinity Bonuses when killed.
Ability Synergy: When activating Cloud Walker with an active Celestial Twin, the twin becomes invulnerable to damage and receives its health restore per meter travelled bonus. After Cloud Walker ends, Wukong's twin is teleported to his side instantly.
Wukong cannot cast other abilities, perform parkour Maneuvers or general interactions while channeling this ability.
Temporarily shed the outer pieces of Xaku in a destructive blast, then stalk the battlefield in a new, swifter skeletal form. Enemies damaged by the body shrapnel are rendered weaker to Void Damage. Xaku's other active abilities' duration is frozen in time and resumes once The Vast Untime expires.
Death and decay encroach as Xaku detonates themselves, expending 100energy to explosively fragment their body parts outward. Enemies within direct Line of Sight and 10 / 15 / 20 / 25 meters of Xaku receive 600 / 800 / 1,000 / 1,200Void damage from the blast and suffer 50%VoidDamage Vulnerability and 10% / 15% / 20% / 25%Slow for 10 / 15 / 20 / 25 seconds. For the same duration, Xaku's skeletal form is exposed, increasing their passive ability's Dodge chance and area damage reduction to 75%, grants themselves a 20% movement speed bonus, and completely pauses the duration timers of Xaku's other abilities. Xaku can reform their body and manually deactivate the ability by holding the ability key (default 4 ).
Debuffed enemies emit a Void energy cloud around their torso.
Increased dodge chance is displayed next to the shield and health indicators as a buff icon with the chance percentage.
Void damage from the blast does not reset Sentient damage resistances.
The blast can destroy Objects, which does not require line of sight.
Ability Synergy:
The Vast Untime pauses the ability duration timers of Xaku's other abilities, including both currently active and newly cast abilities while in skeletal form.
Only abilities belonging to Xaku originally are affected by the timer pause, whereas subsumed abilities via the Helminth system are not affected.
Can be recast while active in skeletal form by pressing the ability key again (default 4 ), causing Xaku to detonate again and affect new enemies in range, as well as refreshing ability duration to full. Note that there is a small window where the timers of Xaku's other abilties can run down before The Vast Untime is recast.
Activating The Vast Untime is a full-body animation that restricts movement and other actions, while deactivation is near-instantaneous.
Xaku crouches in place, visually detaching their body pieces and suspending them in the air with Void energy tethers. Xaku then reels back, surging into the air, while most of their pieces scatter outward in an expanding Void energy blast. Xaku's skeletal form retains some body pieces for bare minimal structural support. Reforming the body pieces on Xaku causes them to quickly regrow on the skeleton.
Equipping the Corporeal appearance auxiliary attachment will have Xaku retain their normal form during The Vast Untime; when casting the ability, Xaku's armor pieces will still fly out and then immediately reattach themselves.
Equipping the Skeletal appearance auxiliary attachment will have Xaku appear in their skeletal form even when not using The Vast Untime.
Tips & Tricks
When modded with high Ability Range, this ability can be used to destroy Storage Containers and Resource Deposits across a massive area, even through walls. When paired with a large Loot Radar, this is an excellent strategy for locating Resource Caches, Syndicate Medallions, and other static objects requiring direct pickup, as those would be the only loot icons that do not disappear or "move" when damaged by the blast. A high gather range from Vacuum or Fetch will also help to clear the area of common loot and show only the valuable resources that must be manually retrieved.
Ivara activates her cloak, turning transparent and rendering her invisible to enemies. While active, Ivara gains 10% / 20% / 30% / 40% bonus damage on headshots at the cost of -50%Movement Speed. Ivara also becomes capable of pickpocketing enemies: if standing beside an enemy with Prowl active, rays of light will shine on an enemy within 2 / 2 / 3 / 4 meters for 4 / 3.5 / 3 / 2.5 seconds with a 100% chance of releasing a random item from that enemy's drop table.
The damage buff is a multiplier that is applied to Ivara's total weapon damage on headshots, but stacks additively with other headshot bonuses. (e.g., with a maxed Intensify and a weapon that inflicts 500 total damage on headshots, a rank-3 Prowl will increase that headshot damage to 500 × (1 + 0.4 × 1.3) = 760).
Movement Speed penalty is multiplicative to other sources of movement speed.
The steal time uses the following expression: Modified Steal Time = Steal Time ÷ (1 + Ability Duration)
With a maxed Continuity, a rank-3 Prowl will have a steal time equal to 2.5 ÷ 1.3 = 1.9231 seconds.
The steal light must shine on the enemy for the duration of the steal time uninterrupted for the pickpocketing to succeed.
Pickpocketing can only be done once per enemy. Only a single enemy can be pickpocketed at a time.
Loot chance is capped at 100%. Reducing Ability Strength reduces the chance for an item to drop. If the attempt was unsuccessful, it will attempt to try again.
Prowl expends 25energy to activate. It then drains 1 point of energy per second while stationary and drains 3 energy per second while walking. Additionally, melee attacks consume 2 energy per hit, and taking damage consumes 10 energy per hit. Prowl will end if Ivara runs out of energy, if certain maneuvers are performed that break the cloak, or if deactivated by pressing the ability key again (default 3 ).
Most maneuvers do not interfere with Prowl. However, Sprinting, Sliding, and Bullet Jumping will break the cloak. Ivara will not re-cloak until the ability is used again.
More specifically, the cloak will be exited when the corresponding keys for Sprinting, Sliding and Bullet Jumping are pressed, not when the maneuvers are actually executed.
Rolling will increase the energy drain to its maximum value, even if no directional keys are used.
Prowl does not suffer movement speed penalties when moving on ziplines; sprinting or sliding on zip lines will not break Prowl's cloak.
Firing a non-silent weapon (i.e., weapons with an "alarming" noise level) will temporarily break the cloak. Ivara will re-cloak shortly after firing the weapon.
The Javlok's alt-fire throw attack is regarded as "silent" and will not break the cloak when thrown.
Despite being regarded as "alarming", the Nagantaka's alt-fire and the Redeemer's shotgun will not break the cloak, though they will still alarm enemies.
Changing a weapon's noise level from "alarming" to "silent" with a max ranked Hush, Suppress, or Silent Battery will prevent the weapon from breaking cloak when fired.
Despite the cloak being disabled, Prowl itself is not, and will continue draining energy and remains capable of pickpocketing enemies.
The re-cloak delay is affected by the weapon's Fire Rate.
Prowl is a one-handed ability and can be used while performing various maneuvers and actions without interruption.
Ivara possesses two Appearance Auxiliary Attachments that make her more visible to players during her Prowl: Semi-Cloak, which makes the Warframe semi-transparent; and Glow-Cloak, which produces an opaque glow. These appearances are affected by primary energy color and do not alter how enemies perceive the player.
Your energy levels can be maintained through the constant theft of energy orbs.
Rolling is actually a viable alternative to Sprinting, allowing you to move quickly without breaking your invisibility. Keep in mind, however, that if you press Shift , (or whichever key you have bound to activate Sprinting with), it will immediately deactivate Prowl.
Combining Prowl with silenced, high-damage, single-shot weapons, or certain types of appropriately-modded melee weapons, can be an effective play style for higher level missions which require stealth.
Some melee weapons well-suited for this method of hunting would be among the following:
A Sword with the Crimson Dervish stance (due to the stealth finisher for that stance being a very fast animation).
A Hammer weapon with the Finishing Touch mod equipped. Hammers already have the highest damage multiplier for stealth finishers, so this mod makes it even more powerful: the damage-multiplier of hammers used for stealth-finishers goes from 2400% weapon damage to 3840% weapon damage.
Firing a non-silent weapon will allow the use of the otherwise not permitted Maneuvers like Bullet Jumping during the brief uncloaked time window without deactivating Prowl.
Note that breaking the invisibility with non-silent weapons does not remove the headshot multiplier you get from Prowl.
Combining Prowl with a melee weapon equipped with Dispatch Overdrive will allow for a large increase in movement speed if you are able to kill the enemy with a Heavy Attack.
Void Sling can be used to cover a great distance in a short amount of time without deactivating or breaking Prowl.
Repeatedly performing the backspring maneuver is the fastest way to move without breaking Prowl besides dashwire jumping.
Firing gunblades, e.g. Redeemer or Sarpa, will alarm nearby enemies but it won't break Prowl's invisibility.
Ivara can use this to distract enemies, similar to using Noise arrow.
Take caution as some enemies, e.g. Kuva Lich and Grineer's Rampart, will blindly shoot at the origin point of the noise.
Be cautious when using Prowl during Disruption missions as Ivara's energy could be drained quickly under some conditions.
Energy drain and health drain have similar effect to taking damage, draining extra energy every time the effect ticks.
Electrifying conduit can deplete Ivara's energy within a few seconds as it rapidly ticks damage.
True to Ivara's role as a silent huntress, Prowi is an ideal skill for Conservation missions in Landscapes such as the Orb Vallis, as the Tranq Rifle is a silent weapon and will not break her invisibility, and thus wildlife will remain unalerted in case she misses her shots.
Do note that using an Echo-Lure breaks Ivara's invisibility, potentially spooking other wildlife that may be nearby or, worse, attracting the attention of enemy patrols and making them attack the target wildlife.
Ivara's Prowl is also temporarily broken when throwing items such as lures and Pharoma into the water while fishing, but not when hurling the fishing spear. The splash made by the spear entering the water does attract patrolling enemies, but they'll otherwise not attack.
Compared to Loki's Invisibility and Ash's Smoke Screen which are active skills (and thus may suddenly disable at crucial moments during the hunt), Prowl is a toggled ability and thus can be sustained at will and far longer with high Ability Duration builds.
Prowl also allows Ivara a chance to steal Power Cells from a Power Carrier, which makes Excavation missions with Ivara much easier as it doubles the number of Power Cells on the field at once, especially after killing Power Carriers for an extra Power Cell.
Nova expends 100energy to unleash a radial wave of antimatter particles. The wave starts 5 meters from Nova and propagates at a speed of 5 meters per second for 2 / 3 / 4 / 6 seconds before dissipating. All enemies in range are coated in antimatter that destabilizes their molecular structure for 10 / 15 / 20 / 30 seconds.
For example, Molecular Prime at rank 3 with 150% Ability Duration will have wave radius of:
5 + (5 × (6 × 150%)) = 50 meters
Tap the ability key to unleash a Slow wave. Hold the ability key to unleash a Speed-Up wave. Primed enemies have their action speed increased or decreased by 35% / 40% / 45% / 50%, receive 100%Damage Vulnerability, and detonate upon death dealing 150 / 300 / 500 / 800Blast damage with 20%Status Chance to enemies within 6 / 7 / 8 / 10 meters.
Slow/speed-up debuff is capped at 75%, achievable with 150% Ability Strength.
Ability Synergy: Enemies killed by Nova while slowed passively have a 15% chance to drop a Health Orb, while enemies killed while sped-up have a 15% chance to drop an Energy Orb.
Each explosion can cause the subsequent death and detonation of nearby enemies, resulting in a chain reaction.
Molecular Prime does not stack from multiple Novas.
Recasting Molecular Prime clears the spread of the previous cast.
Molecular Fission is a Warframe Augment Mod for Nova's Molecular Prime that makes primed enemies restore Null Star charges when killed and causes Null Star particles to inflict Molecular Prime.
Speed-Up (hold cast) is particularly useful in Defense missions to force enemy waves to come out faster.
Speed-Up now works on Eximus units, although the slow does not.
Molecular Prime works incredibly well in conjunction with Antimatter Drop, weakening a boss, or killing entire legions of enemies by triggering an explosion.
It should be noted that the slow effect for Molecular Prime stacks with other abilities that slow. When used alongside Frost's Snow Globe, or other effects such as Cold elemental mods, this ability is also capable of bringing enemies and bosses to a grinding halt, dramatically slowing them and easing the capability of landing headshots for the whole team.
Synergizes well with Nyx's Chaos as units will attack each other dealing double damage, weakening every individual until someone dies and causes a series of chain explosions that can kill the entire group.
Synergizes well with Saryn's SporesCorrosive proc by first spreading and weakening every individual armored unit, then causing a series of chain explosions when a single one dies.
Synergizes well with Loki's augment mod Irradiating Disarm for his fourth ability Radial Disarm which creates an AoE disarm and Radiation proc as units will attack each other dealing double damage, weakening every individual until someone dies and causes a series of chain explosions that can kill the entire group.
Primed enemies' bodies visibly dissolve after death by detonation, but they are actually hidden and not yet removed, thus allowing Nekros to cast Desecrate.
Bugs
Casting Molecular Prime then having a Trinity cast Blessing before executing a target will cause the explosion to be the color of the Trinity's energy, rather than your own.
Summon a radial pulse wave that ensnares and slows enemies, siphoning their lifeforce for the Death Well. Allies within the wave steal health with each attack.
Sevagoth unleashes flowing darkness around him, as a radial wave pulses out at a speed of 1 / 1.2 / 1.5 / 2 meters per second, beginning from 1 / 2 / 3 / 4 meters then expands up to 5 / 8 / 11 / 16 meters. Enemies within his aura suffer from 25% / 30% / 33% / 35%Slow, whilst Sevagoth and allies standing within gain 1% / 2% / 3% / 5% lifesteal for damage dealt with weapons and abilities against any enemies.
Slow does not update dynamically with changes to ability strength such as Growing Power, Molt Augmented, or Arcane Ice Storm while active, only taking into account such effects when initially activated.
Gloom also affects fighters flying too close to a Railjack, allowing the aura user to heal themselves while using a turret, be it via direct fire or offensive abilities such as Shatter Burst.
Sevagoth does not require enemies to be in Line of Sight to be slowed.
Gloom costs 50energy to deploy. Once active, Gloom reacts to enemy presence in its radius, slowing all enemies within. Each enemy slowed by Gloom drains a base amount of 0.75 energy per second, stacking up to a cap of 10 enemies for a maximum drain amount of 7.5 energy per second, to maintain the aura until deactivated manually by pressing the ability key again (default 3 ) or automatically when Sevagoth runs out of energy.
Energy drain enemy cap is not affected by mods.
Sevagoth himself, his Shadow, and allies within Gloom do not trigger energy drain per second, granting them a persistent lifesteal effect while in range.
While Gloom is active, but not draining energy, Sevagoth can replenish energy using Rally Point, Energy Siphon, Energy Nexus, Dreamer's Bond, and/or Wellspring. If an enemy walks into range the energy replenishment from these effects will halt until the enemy is removed from the radius.
Do note that Sevagoth and his allies can still heal themselves while attacking these slow-immune enemies as long as everyone is within his aura.
Going Operator mode while Gloom is toggled disables both its healing and slowing effects, even though the aura is still visible. Returning to Sevagoth promptly reactivates it, unless a nullifier bubble, a Disruption Demo Unit, or a possessed Exolizer crosses the frame to forcefully disable it.
Ability Synergy:
While Gloom is active, damage dealt by Reap's Shadow and Sow heal Sevagoth's health. Damage dealt by Consume further heals the Shadow's health with lifesteal while the Shadow remains in range.
Gloom remains activated and centered on Sevagoth's body during Exalted Shadow.
Each enemy alive within Gloom's radius fills 0.1% per second of the Death Well for Exalted Shadow.
Casting Gloom is a full-body animation that restricts grounded movement and other actions. Deactivating Gloom is instantaneous and does not play an animation.
Sevagoth visually conjures a shadow wave then sustains the ring of flowing darkness that indicates the aura radius, visible only to himself. Both he and his allies affected by Gloom visually emit a spiraling shadow torrent around their legs. Affected enemies visually appear hindered by three shadowy clouds around their head, torso, and thigh regions.
Subsuming Sevagoth to the Helminth will offer Gloom and its augments to be used by other Warframes.
When injected into Lavos, Gloom is altered to cost 0 energy to cast and sustain, lasts for 12 seconds that triggers a 10 second cooldown after deactivation.
Tips & Tricks
As the ability's energy drain is only dependent on the number of enemies within the slowing aura, Blind Rage is a practical mod to equip to maximize the slowing effect. Do note that the reduced efficiency does increase the toggling cost.
Investing in increased Energy reserves, such as by using Flow (Primed) or slotting Azure Archon Shards, also ensures the longevity of a toggled Gloom aura.
Ability Strength bonuses from various sources can assist in reaching higher slow effect of Gloom and, in some cases, free mod slots.
Protea trivializes the Ability Strength requirements to reach the Slow effect cap, as her additive 100% Ability Strength bonus every 4th ability cast means that she only has to mod for the remaining 72% Ability Strength, then reach the bonus by using her other abilities. Dispensary also lets her manage the Energy costs easily.
If Gloom is subsumed onto a given Warframe's fourth ability, Precision Intensify can used to reach the slow cap, leaving only the 82% remaining Ability Strength to be reached with other sources.
When extracted, Gloom is a very versatile ability to infuse into Warframes that otherwise have no means to heal in their ability kits (i.e. Mesa can heal herself with Peacemaker as she shoots down enemies within range of her infused Gloom}.
Garuda can exchange Blood Altar for Gloom, becoming a mobile offensive healer and crowd controller that is sustained extremely well by Bloodletting. This comes at the cost of Blood Altar's disabling ability and its passive healing, as she must actively attack to heal herself.
Ember can easily reach 95% Slow effect with her passive, in combination with several Ability Strength mods.
Kavor Defectors and Arbitration Defense targets can heal themselves by shooting enemies while under the effects of Gloom.
Hostile Necramechs are also slowed by Gloom, making aiming at their exposed weakpoints far easier. Also, Loid and Otak's survivability is increased as long as the Gloom user stays near them to keep the Infested at bay.
Inaros Prime can opt to infuse himself with Gloom to help Baro Ki'Teer survive better in Void Raider missions, not only to help manage incoming Nightwatch enemies but also, as with the above Defectors, help him heal himself when he attacks.
Gloom will also affect Demo units in Disruption missions should they wander into range, but their nullifying pulses will briefly remove the slowing effect allowing for short "hops" towards the conduit. Coming too close to the Demo units while using the nullifying pulse can also dispel Gloom, so players should be mindful of reactivating it as soon as possible.
Be careful when doing missions in the Zariman Ten Zero, as Thrax Legates and Centurions are not slowed by Gloom until their Overguard is dealt with and can take players by complete surprise.
Note that Gloom can sometimes prolong the invulnerability phases of enemies, such as Torment while she is using Tidal Surge, so be mindful of either moving away from them or disable Gloom to let them finish their invulnerability mode.
Bugs
Gloom can sometimes inadvertently set off the alarms of data vaults in Spy missions when the aura slows down patrolling Sensor Regulators or Orokin Spectator drones.
If subsumed onto Harrow, Thurible will not grant energy on kill if enemies are under the effect of Gloom
")
")
")
")
")
")
")
")


")
")
")
")
")
")
")
")
")
")
")
")
")
")
")
")
")
")
")
")
")
")
")
")


")
")
")
")


")
")